Conseils de guide
The right equipment for mountaineering
Don't know what to wear or what equipment to take for mountaineering?
Here are a few advises and photos of equipment to get you ready on D-day!

Mountaineering is a demanding sport, requiring you to evolve in an environment you don't experience every day!
It's a demanding sport that requires good physical condition, technical skills, in-depth knowledge of the mountains and, above all, the right equipment.
To help you make sense of it all, we've put together a list of good mountaineering equipment and tips on what to wear.
Which clothing for mountaineering ?
Gloves

You'll need 2 pairs:
- A pair of thin gloves (a model like the two pairs on the right in the picture). These gloves will be ideal for low-altitude sections and if you get hot while making effort.
- A pair of thicker gloves, either mittens or gloves, depending on your preference. Remember that just like socks, putting on several pairs could have the opposite effect: instead of being warmer, you'll be colder...
The first layer
.jpg)
When you're mountaineering, the weather conditions can change very quickly, so you're constantly taking off and putting on layers. Therefore, you need all sorts of layers, some lighter than others.
The first layer is light and breathable. It wicks away sweat and moisture. Merino wool has a number of advantages: it insulates well, it doesn't itch on contact with the skin, it wicks away moisture, it doesn't retain odours, it's lightweight and keeps its shape without creasing. And it's all naturally durable!
For this first layer, we recommend: a technical tee-shirt (short or long sleeves) and technical bottoms such as leggings or thermal tights.
The second layer
.jpg) The second layer is thermal, and will keep your body warm.
The second layer is thermal, and will keep your body warm.
For this second layer, we recommend: a fleece jacket (not too warm) or a technical jacket like the ones in the picture.
Remember : it's better to set off when you're cold than when you're too hot - you'll see, effort warms you up quickly!
The third layer
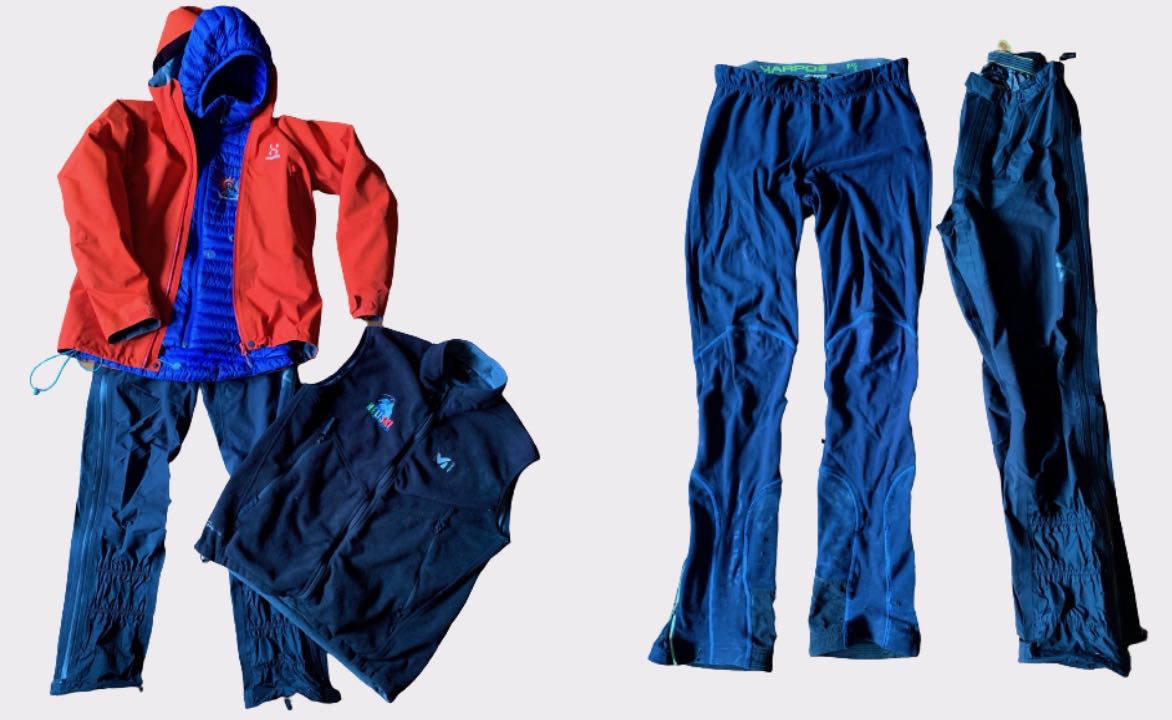 The third layer is insulating, meaning that it protects you from the wind, rain or snow. This layer is not to be neglected! As you can see from the photo, other elements have been added:
- A down jacket (thicker or thinner depending on how chilly you are, to be carried at the bottom of your backpack)
- A Gore-Tex jacket
- Optional: a sleeveless jacket/fleece if you get cold quickly
- Your trousers must be waterproof, breathable and unlined. We strongly recommend tube-shaped trousers (tightened at the ankles) and not wide trousers, as the movements you make with crampons can cause to tear the bottom of the trousers.
For this third layer, we advise you to take all these items with you!
The head
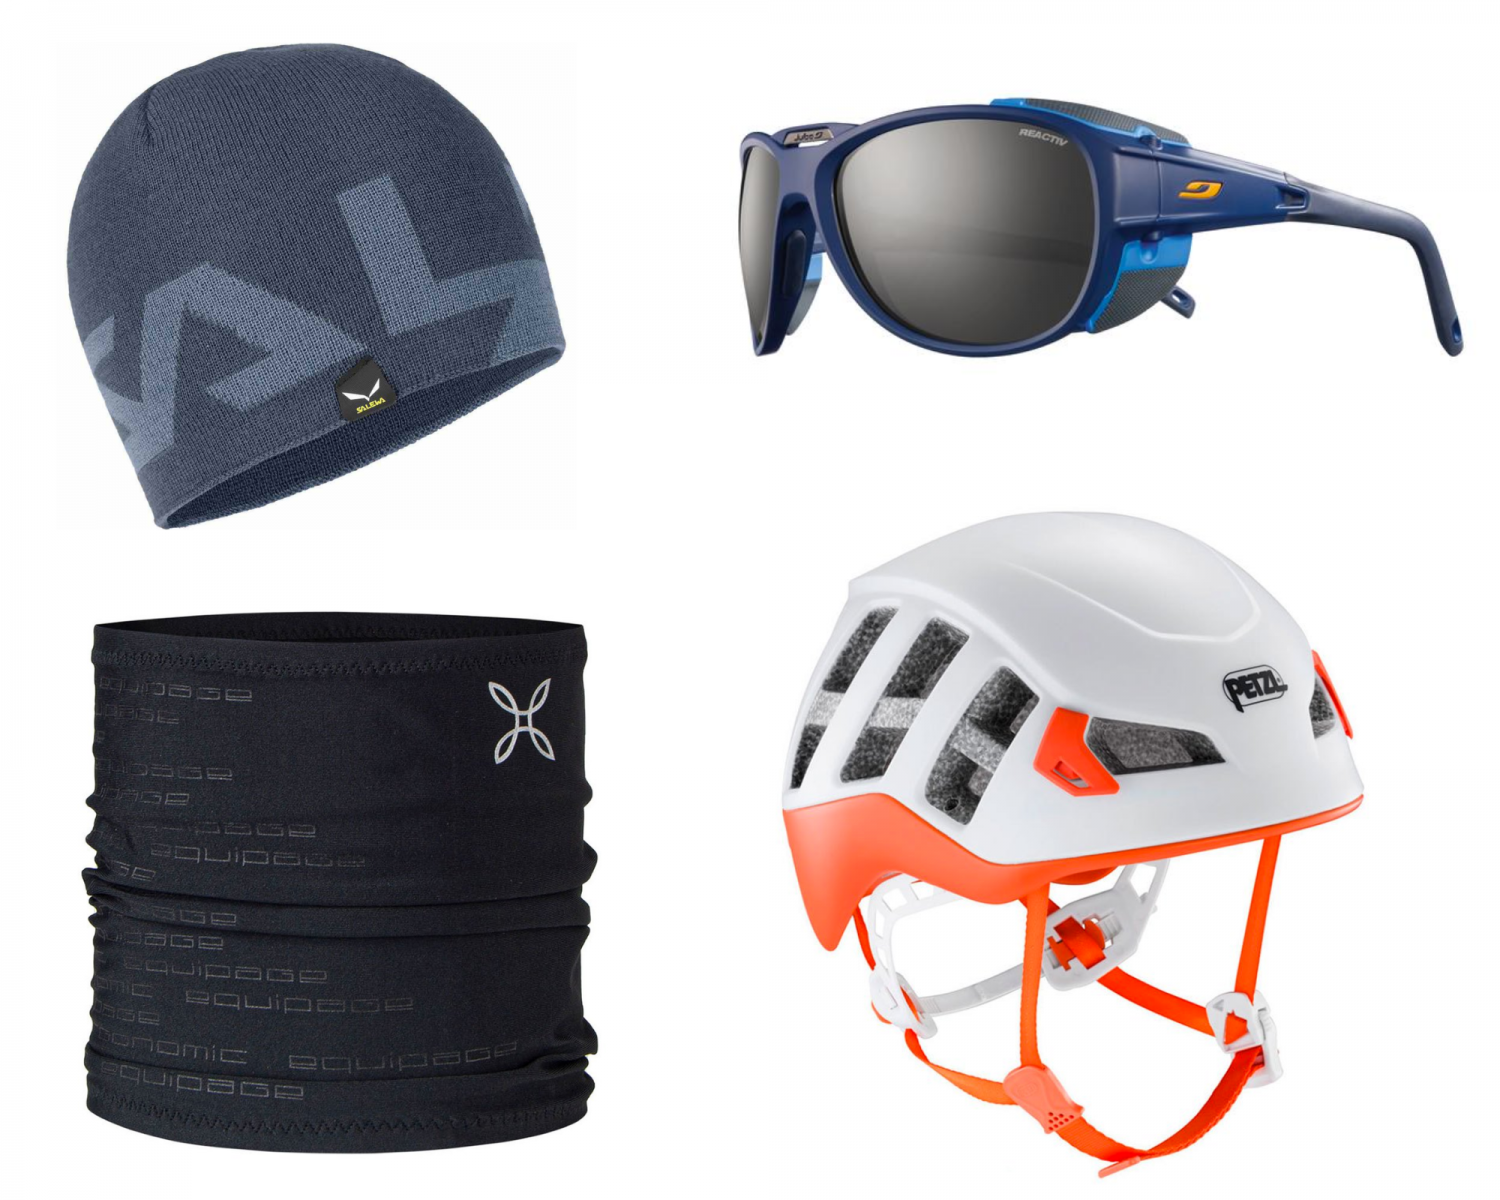
For your head, you'll need a number of items:
- A hat, which should not be too thick so as not to get in the way when it is under the helmet. It will keep your ears and head at room temperature throughout the ascent.
- Sunglasses: as you probably already know, snow has a strong negative impact on the pupils. Sunglasses will help you fight the wind, protect you from UV rays (lenses factor 4 recommended) and keep the light out. We recommend sunglasses with visors on the sides (as shown in the photo) to protect your eyes as much as possible.
- A neckband will protect you from the wind and will be very useful in bad weather conditions. You can place it over your face to protect you from the wind / cold / sun.
- A helmet: it's essential to wear a helmet. In the high mountains, a rock fall can happen very quickly...
Technical equipment
Safety first and foremost! To achieve this, we use the basic climbing equipment, i.e. a harness to which the rope will be attached.

.jpg) Gaiters : these will keep the snow out of your boots and provide better insulation against the cold. They'll also keep your trousers free of holes.
Gaiters : these will keep the snow out of your boots and provide better insulation against the cold. They'll also keep your trousers free of holes.- Ice axe : as you can see from the picture, there are ice axes of different lengths. We advise you to go to a shop to choose the ones best suited to your size.
A little tip: when you hold it, the tip should be at or just above your malleolus.
Shoes and crampons
 Crampons : These are attached to the bottom of your mountaineering boots to walk on the snow and ice easier and without slipping. We strongly recommend strap-on/universal crampons. Their advantage is that they can fit to any mountaineering boot.
If possible, take some with boot protectors (that's the yellow bump you can see in the photo). These are accessories attached to the underside of crampons to prevent the accumulation of snow that hinders walking.
Mountaineering boots
 The choice of mountaineering boots is crucial to ensure safety and comfort during your mountain ascents.
There are several criteria to take into account:
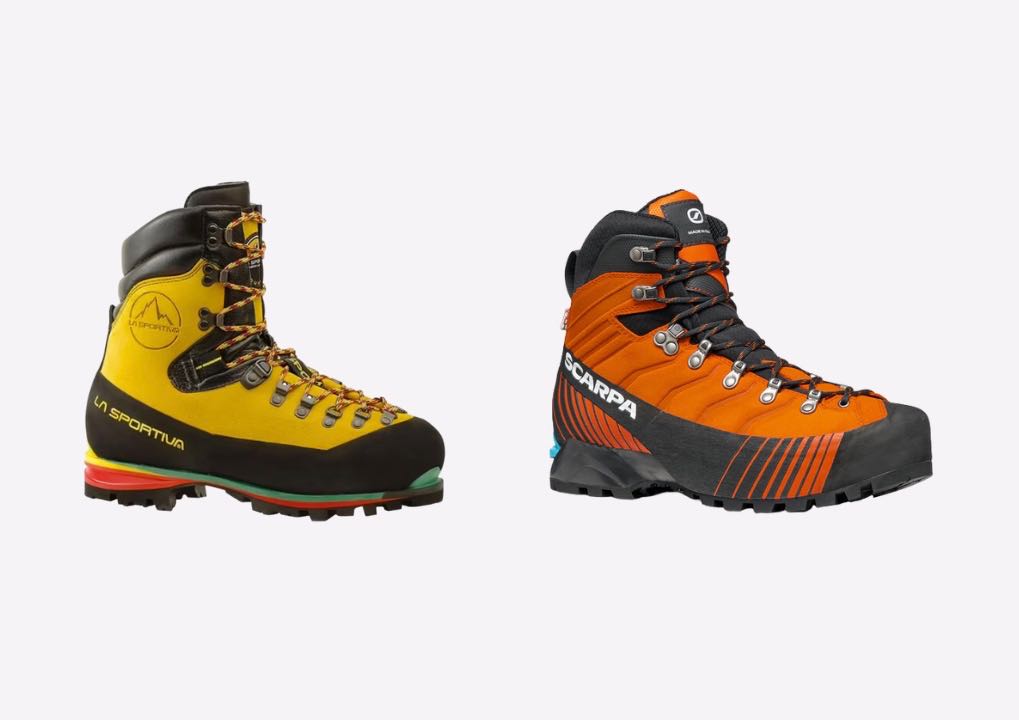
- Rigidity: mountaineering boots are classified into three categories according to their rigidity: soft, semi-rigid and rigid. The rigidity of the boot depends on the type of mountaineering you do. For technical terrain and high-altitude ascents, rigid boots are recommended to provide good support and better stability when using crampons.
- Insulation and breathability: this is the most important criteria - if your feet are cold, you won't enjoy the climb, and you may find it almost impossible to move forward!
Make sure they are also breathable to wick away the sweat and prevent moisture building up inside the boot.
- Finally, as far as fit and ankle support are concerned, you can go to the shop to test them out and see which type of shoe suits you best.
The two models pictured here are very good mountaineering boots and we recommend them.
IMPORTANT: It is important to make your shoes to your feet, however you need to use your mountaineering boots on suitable terrain (on snow) and, above all, not for too long. You could, for example, go for a walk in them for 1 hour, but no longer... do not make the mistake to go on a long hike / trek with mountaineering shoes, you will ruin your feet...
The mountaineering backpack
.jpg) When it comes to backpacks, we recommend this type of backpack with ice axe straps.
When it comes to backpacks, we recommend this type of backpack with ice axe straps.
Ideally, take a 35-litre backpack.
Don't forget
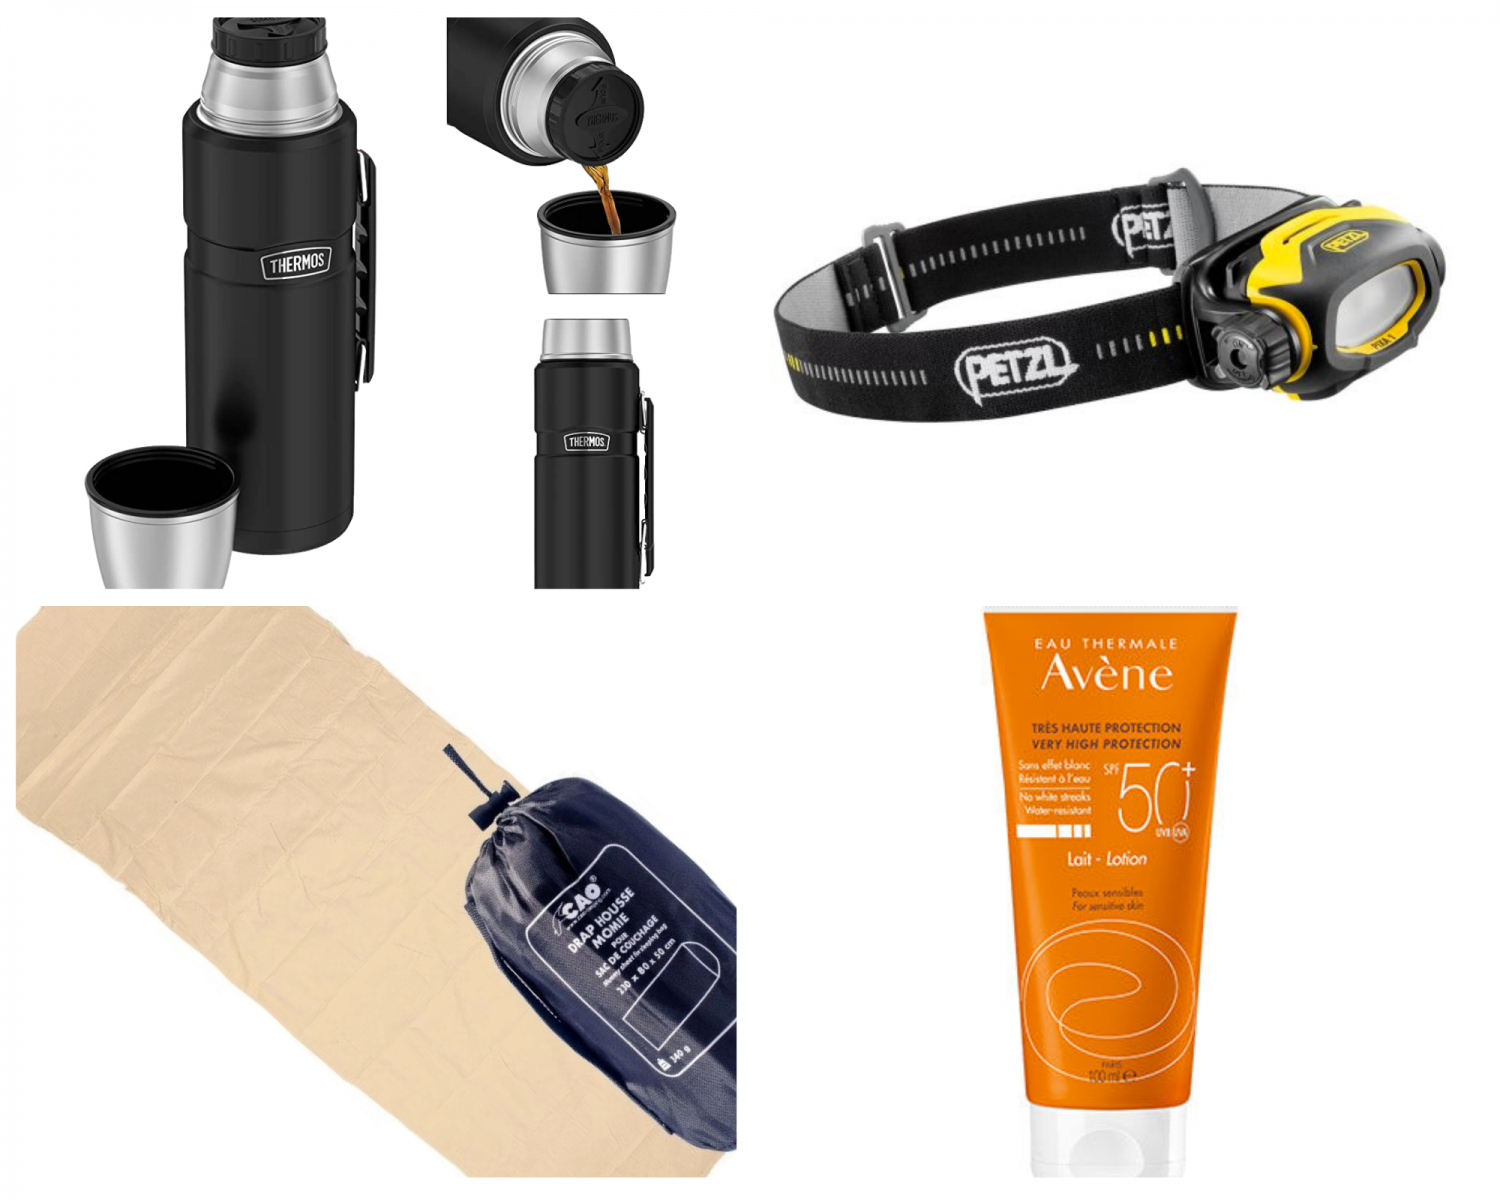
- A thermos flask : when you reach high altitude, you'll be glad to comfort yourself with a sweet and, above all, hot drink!
- A headlamp : for starting out in the morning and moving around the refuge at night without disturbing others.
- Meat bag/sleeping sheet : for the refuge, sanitary issues since the covid...
- A good sun cream : we know you want to tan :) But SPF 50 sun cream is essential, because of the sun's reflection on the snow!
Don't take a water bag, as water freezes at altitude...
Detailed equipment lists can be found in each of our mountaineering programs: click here.


